
So, I persevered. I kept feeding and caring for my starter despite its very horrible acrid smell and finally everything came together. The starter would double in size within half a day and once more smelt inviting with lots of bubbles throughout the mix. Time to make a loaf.
Having completed a bakery course with Daniel Stevens, formerly of River Cottage and the author of Bread – River Cottage Handbook No. 3, I decided to trust the River Cottage method that I found online.
Read making sourdough part one from Spear’s
This told me to make a sponge the night before making my loaf, which means taking 150ml of your starter and mixing it with 250g flour (white or a mix) and another 275ml of warm water. You will end up with a big bowl of runny mix that you need to cover and leave overnight. You can use cling film but personally I prefer to use those disposable shower caps you pick up in hotels. It is much easier and you can reuse them if you’re careful.
The following morning you should, and thankfully I did, end up with a bubbly mixture that is happily fermenting away and much thicker than the night before. At this stage add your remaining flour – 300g, along with a slug of olive or rapeseed oil (roughly one tablespoon) and your salt. I don’t like my bread too salty so I go for 9g rather than 10g, but you just need to play around a bit and find out what suits your taste.
Read more recipes from Spear’s Food Friday
Combine all the ingredients and knead until you have a smooth, silky dough. The dough is very wet, but do keep going and don’t add lots of extra flour as the bread will have a much better texture this way. If you are struggling get yourself a dough scraper, or bread flap as I prefer to call it, as this really helps you shape and control your dough without getting sticky hands.
Once the dough is nicely kneaded place into a lightly oiled bowl, cover with your shower cap (or clean cloth or cling film) once again and allow it to rise in a warm kitchen until it is double the size. This can take some time, however, I found that my dough doubled in size in only a few hours.
Knock the dough back and shape into a nice ball, tucking the edges under with your hands. Place upside down into a well-floured banneton or a bowl lined with a clean and well floured cloth. You place the dough in bottom up so that when you turn it out it will be the right way up again. Allow to double in size again, covered with the shower cap once again.
Heat your oven to its highest temperature. Five to ten minutes before you put your bread in the oven, place your backing stone or tray into the oven to heat up.
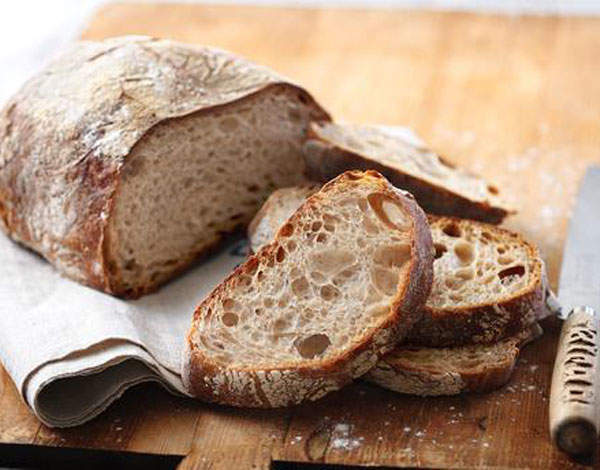
When it is hot, remove, dust with flour and turn your loaf out onto the tray and quickly pop back into the oven. Splash a cup of water into the bottom of your oven to help the crust form and leave to cook at this high temperature for ten minutes. Then turn your oven down to 200 or thereabouts and cook for a further 30 minutes until it sounds hollow and has a good colouring. And voila – a sourdough loaf from scratch.
The only issue I have had is with the turning out of the loaf. For my first attempt I was a little overexcited and didn’t aim particularly well so a little of the loaf missed the tray. I then had to manhandle it into the middle, which knocked much of the air out of it. It still worked fine, though.
The second time the dough stuck to the cloth, which I had clearly not floured liberally enough. I’m eyeing up a proper banneton for attempt number three but if you don’t mind a slightly freeform loaf you will be fine without one.
It might sound like a little bit of an effort, but the bread you end up with at the end is infinitely better than a regular loaf with easy active yeast – it has much more character, depth of flavour and structure. Give it a go. You won’t be disappointed (just perhaps a little covered in flour…)


